DRESS TO KIMONO DIY

kimono diy www.rootsandfeathers.com.jpg

You may remember me styling up this dress here.  As cute as it was as a dress, it was just a bit snug on me, so I thought I was convert it into something new that would actually get worn more... A kimono!  This was a very simple afternoon project that anyone can do with just a few supplies.  I'm planning on doing a few more pieces our of my closet now that I know it came out good. 

kimono diy www.rootsandfeathers.com.jpg

S U P P L I E S: 

dress or shirt // scissors // thread + needle or sewing machine // fabric glue // pins // iron // optional fringe trim


kimono diy www.rootsandfeathers.com.jpg

S T E P S: 

1. Lay your dress out super flat and mark down the center of the front in a straight line, either visually or with a fabric marker.  Cut your dress down that line.

2. Fold under the raw edge twice, about 1/4 inch wide, to create a hem.  Iron down flat and pink along the entire hemline. 

3. Sew your hemline.  This can be done by hand if you don't have a sewing machine, it will just take longer.   

4. Take your fringe and measure the length where you want it to go.  I chose the arms, so i pinned it where I wanted it to go and then cut off the excess length.   

5. This step can be done two different ways.  One would be to sew the trim in play, just like you did the hemline.  The armholes on this dress were small and it barely fit over my sewing machine, so I opted to use fabric glue instead.  I kept it pinned down, and I applied fabric glue along the edge, one pin at a time.  Once I was done I reapplied several pins along the hemline to hold it together while it dried.  After about 2 hours you can remove the pins and let it set the rest of the way overnight.  The next day it was secure and finished! 


kimono diy www.rootsandfeathers.com.jpg

I'm so excited to revamp a few more pieces!  I need to get some more fringe trim b/c I would love to do some with trim all along the edges.  I have a sheer floral top that is begging to be transformed!  If you make one, please send me photos!  I would so love to see. 

kimono diy www.rootsandfeathers.com.jpg

outfit details: dress (kimono diy) seinside // fringe top - lulu's.com // boots - blowfish shoes // necklace - sun & glory // hat + shorts - thrifted


NATURE KEEPSAKE JAR DIY

nature keepsake jar diy.jpg

I know this blog has never been one for DIYS, but I've been daydreaming of a few things Id love to share with you for a while... so I'm thinking of bringing a few DIY type posts here!  I did not intend this to be a diy when I took these photos, so I don't have any of the actual process... but it's simple enough I don't think you need them. 

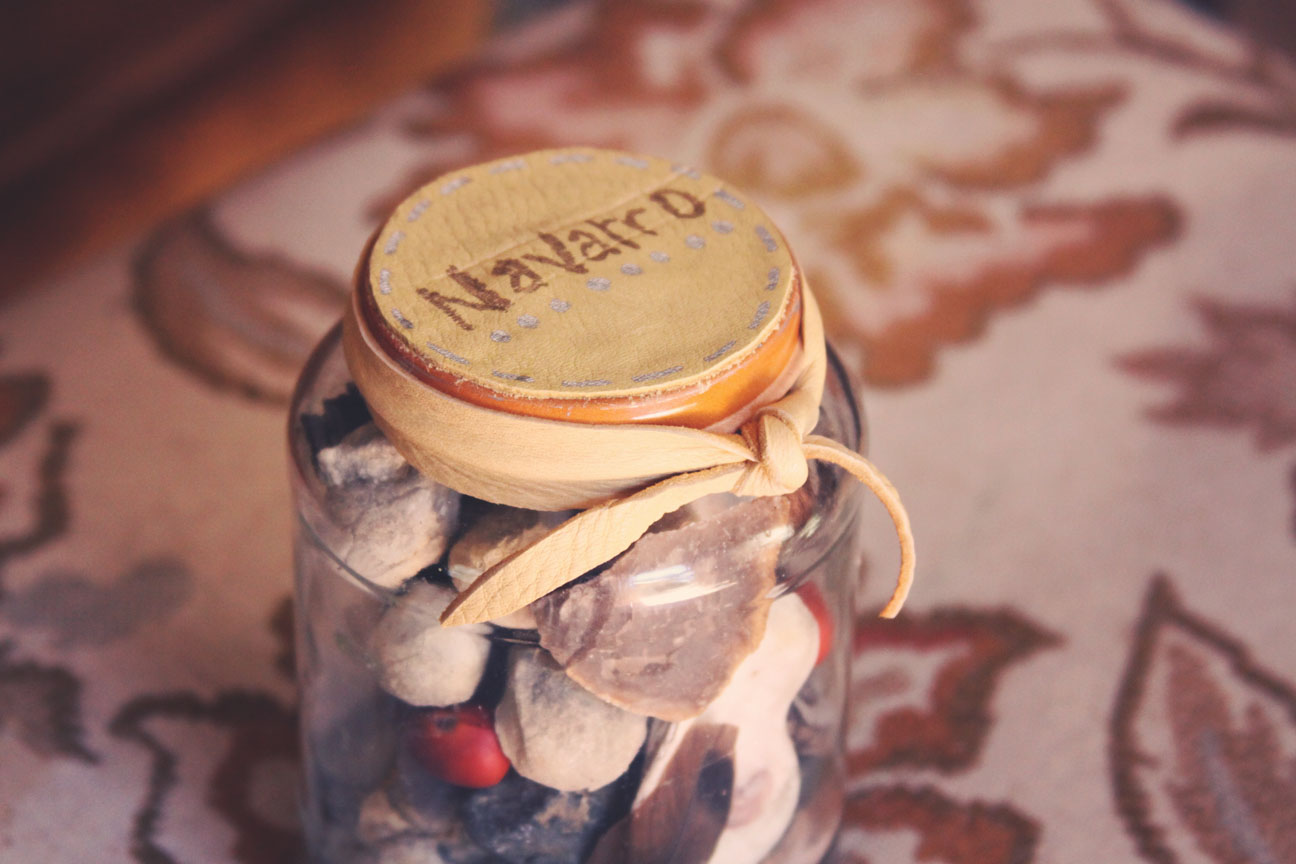
This was a gift I gave my best friend for her son's birth.  It is his first 'nature collection' of things native to Texas.  I think this would make a really great gift for baby, or just as a keepsake of things from a special trip you may have taken... How fun would it be to have keepsake jars from all of your trips to remember them by! 

nature keepsake jar diy.jpg

- S U P P L Y   L I S T -

old jar (this was a food jar) // leather (or fabric) // scissors // marker // glue // pieces from nature

my nature elements included: feathers, rocks, deerhearts (fossils), seashells, sticks, seeds & bones. 


nature keepsake jar diy.png

 - S T E P S -

1 // collect your items from nature & arrange them in your jar.  i tried to fill my jar with as much intention as possible so that each item was on 'display'.  i also packed it as full as possible to keep all the items from shifting around alot.  you could size your bottle according to the amount of items you have to fill it with.   

2 // trace your jar lid on the backside of your leather or fabric and cut it out.  you may want to write on it before gluing it on, just in case you mess up and want to start over.  you could write a name on it if it's a gift, or you could title it for your 'trip' and add a date to it!  get creative and decorate it however you see fit.  if you are using fabric, you could even embroider a name on it.

3 // cut out a strip of leather or fabric that is longer than the circumference of your lid. 

4 // glue your fabric to the top of your lid & tie your strip around the jar.  i tried making my strip thick enough of cover the jar lid as much as i could.  i also glued it in place over the lid since it was for a baby gift, which makes it unable to be opened until mom decides he is old enough to play with the items inside. 


nature keepsake jar diy.jpg

If you decide to make one, I would LOVE to see a photo!  Enjoy! 

Geometric Fringed Crop Top DIY by Sincerely Kinsey >>>

Today I am super excited to share with you a fun diy from my sweet pal Kinsey.  If you have not yet visited her blog, you must, like now.  It is full of beautiful diys and equally amazing photography.  You will not be disappointed.  Since its sunday, this would be a great way to spend your afternoon.  Go grab one of your hubby's old plain tees that he never wears...

 Supplies: t shirt, bleach, cardboard, masking tape, scissors.
Pantry Supplies: Something to lay your t shirt on when applying the bleach. I used a large trash bag. 

First, begin by cutting off the sleeves, the hem, and create a lower neckline to have the fit of a cropped tank top. Next, cut out a stencil with the cardboard. I chose a simple wave pattern. You will also want to save some of the cardboard to place inside the shirt so that the bleach doesn't leak through to the other side. Next, tape out a simple design onto the t shirt. Now you're ready to begin the bleaching process. I ended up pouring the bleach into a plastic spray bottle, making it easier to aim where the bleach went. I used a heavy layer of bleach, causing it to seep through the tape a little. You can prevent this by spraying a less bleach and wiping it off the top of the tape with a towel as soon is it has contact. Use the cardboard as an outline and be creative! Once the spraying is complete, let it dry in the sun for a few hours. Once it's dry, fringe the bottom of the crop top. Lastly, rinse and hand wash your shirt. The reason I rinsed and washed it after cutting it was so that the fringe would curl a bit, giving it more of a rough cut look. All finished!  


Thank you Kinsey!

PEACE,
Laura

Guest Post - Skunkboy Creatures - Feather Lantern DIY >>>

 Today's super simple and beautiful DIY is brought to you by the adorable Katie of Skunkboy Creatures.  For those of you who may not know her, she makes the most amazing plushies ever.  She has such a vision and brings them to life with such style.  >>>
 
***Using any mason jars, glasses, or vases you may have around your house, fill them with feathers.  Place a flameless candle in the center and *VOILA*!  Beautiful mood lighting!***
*this would make a perfect christmas decoration or for a romantic home dinner*

PEACE,
Laura